In this tutorial, we show you how to capture the drum kit, the backbone of most tracks.
What do we need to know about drums before we start? Well, they're very, very loud, so we'll need to think carefully about where to record them and what types of microphones to use. Mic-wise, drums aren't too picky, and a couple of decent dynamics will give you acceptable results at first.
The overheads
The central hub of any drum recording setup is the overhead mics. Placed above the whole kit, one or two mics can be enough to do a pretty good job alone, and at the very least will form the main basis. Ideally, you want some kind of large-diaphragm condensers at work here for full effect. Placement is everything, and don't worry about keeping them symmetrical on any axis. Start with the mics about two to three metres off the floor and then move them around to get the best balance you can. This is trial and error, but remember that while cymbals throw their sound all over the place, hi-hat sound radiates horizontally. If your space doesn't allow for such high placement, try a couple of cardioid condensers placed over each half of the kit. Keep your headphones on and monitor the results carefully - and don't even think about mic'ing any other drums until you've got this bit nailed.
The kick
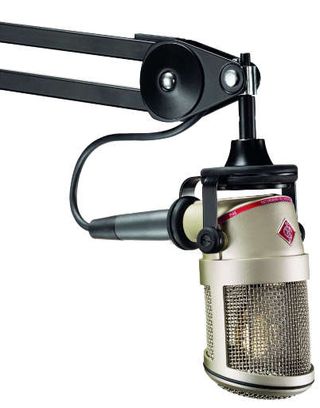
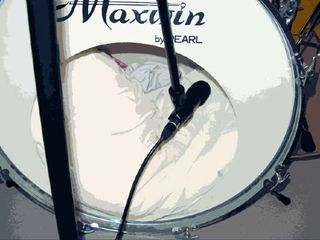
Kicks drums almost always benefit from a close microphone, and because of their extreme sound-pressure levels (and proximity to feet) the mic you're using needs to be quite robust. If you're serious about your drum recordings, it makes sense to go out and buy a dedicated kick drum mic. They're almost always dynamic, so the ubiquitous Shure SM58 is ideal. Make sure you clearly label your kick microphone, whatever it is, as it will wear out quicker than most, and you don't want to subject any others to the same kind of damage.
In terms of placement, get your microphone as close to the drum surface as possible - if you're getting too much resonance or rattle, a pillow or something similar placed inside the kick drum will help stop this. Start with the microphone half-way between the kick head and the edge of the drum, but be sure to experiment, and don't touch the EQ until you're sure you have the best placement possible, as even the smallest of changes can totally transform the sound.
Snare drums
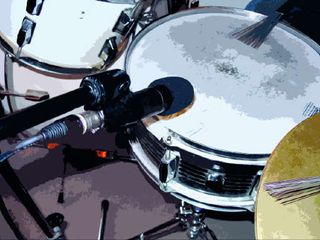
You can go down the condenser or dynamic route with the snare, but since it'll be within drumstick distance, we'd recommend a robust dynamic pencil mic, such as Shure's SM57. Dynamics also impart a natural limiting effect, as they're slower to respond to transients.
Placement-wise, you want it pointing slightly down, away from the hi-hats and the rush of air they produce. Also, try to have it quite near the outer edge of the batter head. For added snare rattle, place it underneath, or even have one mic above and another below (be sure to invert the phase of one, though, as they'll be picking up opposite pressure waves). Whether or not to choose a mic with a cardioid or hyper-cardioid pickup pattern is up to you. The former provides a fuller sound, but the latter will be cleaner and more isolated - play to the strengths of your setup.
Toms
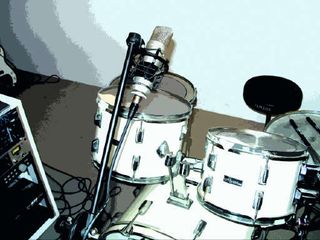
In most cases you can leave the toms to the overheads, but if you want a bit more control, the simplest option is to treat them like your snare and use a dynamic mic angled down towards the centre of each. In a two tom setup you can also try a single mic with a wide-cardioid pattern placed carefully in between. You can even place mics inside the toms, but this can lead to an excessively resonant sound.
Monitoring
If your drummer is just bashing out loops, they might not even need headphones, but in most cases they'll be playing along with a click, band or backing track, which means they will. So you'll need to give them a half decent drum mix, or they'll be all over the place. We'd suggest a sub-mix for drums, so you can tweak individual levels and the overall level. It's sometimes even worth providing a little analogue mixer for the drummer's monitoring, supplied from about four outputs on your audio interface, so that they can tweak their own levels.
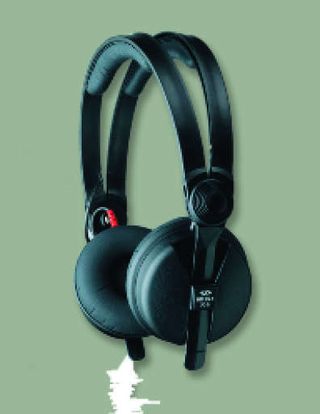
Latency is a problem for drummers. Some are able to mentally compensate for any monitoring delays, but if yours can't, you have two options. First, you can use an external mixer, placed before your audio interface, which can be used by the drummer for monitoring and to supply simultaneous outputs to your computer. Second, and even easier, they can listen to their drumming in one ear and have the headphones play the backing track in the other. The Sennheiser HD25, although expensive, is excellent for this, as it has less noise bleed than any other pair we've tried.
One mic or two?
We're often asked, 'How many drum mics should I use?' After the obligatory jokes, we explain that it's like measuring a piece of string. As a general guide, the harder you're going to bang the drums (rock), the more reverb you plan to add (rock), and if you plan to use bloody great tom rolls (rock), the more close-mics you'll need to give yourself mixing and processing options. But if you're using brushes (jazz), aren't using too many - if any - toms (funk) and want the feel of Ronnie Scott's rather than Wembley (jazz and funk), then you can get away with far fewer microphones - possibly just one or two overheads.
If you have the mics, though, it's always worth trying a few close - you can always rely solely on the overheads if you want to, anyway. Just remember, every mic you add further compounds bleed and phase issues at mixdown. Not only that, but placing one mic correctly takes a long time to master for a given kit, room and player, so each mic makes your life potentially much harder upfront. And as you add mics to the mix, bring in your overheads, as they'll then only be needed for the hats and cymbals.
Ambience
Being loud, drums create brighter and more noticeable reflections than other instruments. And their sparse nature and short release times (cymbals notwithstanding), mean we're far more aware of these reflections than with other instruments, even if we aren't conscious of it. Consequently, many engineers include ambient mics in their setup. These are usually placed as far away from the kit as the space allows, to capture the room's sound. The mic you choose is really to taste on this one, but as sound levels are quieter and the risk of damage, we like to use a nice pair of condensers.
Making space
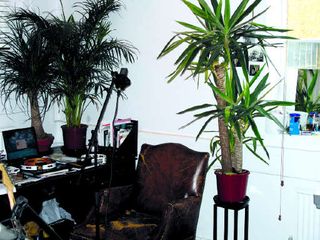
Generally speaking, pro studios will have a separate booth for the drummer. This is so that they can't disturb the rest of the band while they play along with a drum machine, but an added benefit is that you can achieve good recording separation and modify the environment in which the drums are being recorded. Drums will naturally generate a great deal of reverberation wherever they are. Since rock drums tend to be soaked in reverb, they're often recorded in wooden or concrete panelled rooms, for big and bright natural reverb. If you're recording rock drums in your own home, larger bathrooms or kitchens are popular.
For most other drum sounds - especially funkier ones - you can go the other way. Place the drums in a smaller, carpeted room. Duvets under the kit, cushions around the place and thick blankets everywhere all help you make space for those intricate grooves.

