There's analogue, and then there's analogue. Never mind your retro outboard and tape emulations - when it comes to bringing vintage vibes to your productions, archaic disc-based recording media are where it's at.
In this tutorial, we'll show you how to make your pristine digital audio clips sound as if they were recorded in the early 1900s and played back on a record player from the same era - and all using nothing but free effects processors from cm Plugins.
Click here to download the files you'll need to complete this tutorial and check out the audio examples at the bottom of the page.
For more on making new audio sound old, pick up the February edition of Computer Music.
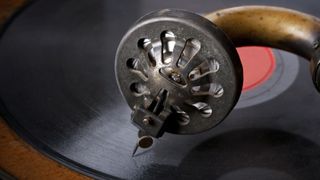
Step 1: Let’s go all-out and send a pristinely recorded production more than a century back in time. Music production was in its infancy, and recordings were made acoustically, channeling sound waves down a funnel or tube to vibrate a mechanical cutter pressed on the rotating cylinder or disc. Playback used the same principle, but in reverse - there were no microphones, mixers, amps, or speakers!

Step 2: To get started, load OldLoop 1.wav in an 85bpm project and loop it - we’re going to use free cm Plugins to recreate those turn-of-the-20th-Century vibes. First things first: put a monoising plugin (such as DeeMonitor with Mid at 0%) on the master bus, as the first recordings were strictly mono.

Step 3: Bass and treble were practically non-existent in antique recordings. To mimic this, place a Philta CM next on the master bus with Lowpass at 3000Hz and Highpass at 300Hz. Set both Slopes to 48dB for a brutally sharp cutoff. You may need to fine-tune the exact filter settings to suit the sound source, but this is a good starting point.
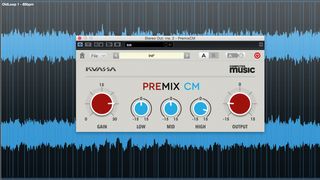
Step 4: Next, we’ll recreate the poor dynamic range and distortion performance of wax and shellac media. Add Premix CM before Philta CM (placing it after would reintroduce frequencies that the filter has shaved off), and increase Gain to 3 o’clock, setting Output to 9 o’clock to compensate. To give the loop more presence, you can boost the Mid and High knobs to taste.
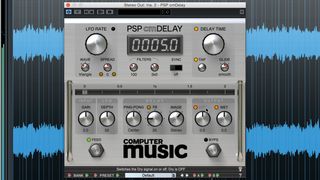
Step 5: Mechanical audio playback is prone to wow and flutter - variations in playback speed affecting timing and pitch. We can recreate this with a modulated delay line. Add PSP Audioware cmDelay before PreMix CM. Click its Dry label to disable the dry part of the sound, and click the Filters label to turn off the filters. Set the Delay Time to 5ms and FB to 0.
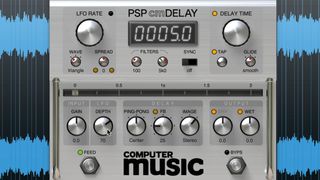
Step 6: Now turn LFO Depth up to maximum, and dial in the LFO Rate to set up a slow wow or a rapid flutter, as you prefer - we set it to the maximum value of 15 for flutter. Pull LFO Depth down when you’re done - 75 is enough for us. If you want wow and flutter, just use two cmDelays in series, each with different settings.
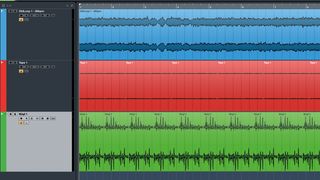
Step 7: What retro recreation would be complete without noise, clicks and pops? Put Vinyl 1.wav and Tape 1.wav on new tracks, disable any tempo-synced looping/warping options, then loop or duplicate the clips. The idea is that the loops do not restart with each bar, as real mechanical noise would be unpredictable. Adjust the tape and noise levels your liking.
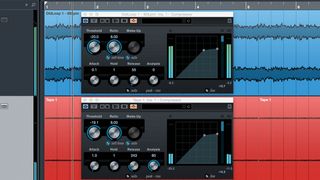
Step 8: We use sidechain compression to make OldLoop1 duck with each of Vinyl 1’s pops and clicks, and to make Tape 1 duck in response to OldLoop1. Have fun running other sounds through this processing chain and trying different tape/noise loops. Don’t forget to dial in plugin parameters such as filter cutoff frequencies to suit your sound source.

